Thursday, September 22, 2011

Working Weekend


This past weekend Elton was out of town and my mom conveniently came into town, which made for a very productive weekend.  I needed someone to light the fire under my heiney-heiney-ho and my Mom was the perfect person to do that.  I got my playroom pillows completed, we recovered the rocking chair for the nursery AND I got the fabric letters done with Lawson’s name.  I blogged about these letters when I did Emery’s and they were still a PAIN!  It was so nice to have my mom help and do half the work and she bought me a light duty staple gun, which made the job A LOT easier.  She also did most of the work with the chair so I have to give her credit for at least half of the work on that and the letters.  Thank you, Mom!!!  

Here are the completed pics:  
Playroom - I took the scraps of my fabrics and put them in embroidery rings (only like $2 at Hobby Lobby) which made for easy wall decor over the play table.
Floor pillow number #1 - my favorite!  This was made from the big piece of fabric I worked so hard on last week.
Floor pillow #2
Chair pillows - I also used the big piece of "pieced fabric" as a border on the ones with the birds.  This other pillow was what I made out of the scraps from my valances.
Chair before
Chair before
 
Chair after

Another pillow I made


Fabric letters - I get the cardboard letters from Papersource, trace them onto posterboard and then cover the posterboard part with batting and fabric.  Then I cover the cardboard letters with fabric on the sides and I glue the posterboard letters on top so there are two fabrics for each letter (hard to see here).  Sounds easy, but it's a lot of work.


Thursday, September 15, 2011

Done! Well, almost...


I've been working for over a week on piecing together a bunch of fabrics I bought for Emery and Lawson's playroom.  I'm now going to turn this big sheet of fabric into some pillows, but I wanted to do this first so part of the pillows had a "quilt" look to them and to bring in a bunch of different fabrics.  It's always the simplest projects I take on that seem to be the most work.  

I had to first cut the fabrics into strips of 1 1/2”, 2”, 3”, and 4” pieces and I then cut them into different lengths (so now I would have lots of lengths, but all the same widths for each grouping).  Then I organized all the different sized pieces into color groups within their “width group” and pieced them together to create really LONG 1 ½” strips, 2” strips, etc.  After I had four really long strips of those varying widths, I cut them into 60” length strips.  To create the large fabric piece shown above, I varied the widths and color groups and sewed them together lengthwise so now I have a big sheet that is 60” by about 30” or so. Got that??  Yeah, it was a little complicated and very time consuming, but I'm sort of in love with how this turned out and feel like it was well worth the work.  I just hope I don’t mess it up from this point on.


I made valances the other month out of some old curtains and one of the fabrics above and also got one very easy pillow (not pictured) with some of the scraps I had from that project.  Thank goodness something has been easy!  


Now I just need two big floor pillows and then maybe some smaller, different sized pillows for the chair.  Hopefully I'll have all this done by the end of the weekend and then I can begin to tackle Lawson's nursery.  Seven more weeks to go in this pregnancy and the nursery isn't anywhere close to being put together.  My mom is coming to visit this weekend so I'm hoping she'll help me motivate to get it done.  

Thursday, September 8, 2011

Current Craft


I have so many friends having babies or just having had a baby and I am WAY behind on my gifts.  Today I finally got motivated to do some baby crafting for two babies (a boy and a girl).  I always see appliquéd onesies and think, “That is so easy- I can totally make that in 5 minutes!” and when I finally get around to giving it a try, it takes me 5 hours.  I don’t know if I’m just really bad at appliquéing or if it’s something that will come with time.  I did learn a few tips today.  One is to put my machine on fast.  When I do it slowly, the onesie gets all bunched up and makes a mess.  The second tip I learned was that I need to just focus on keeping the edge of the fabric between my walking foot and stop worrying about what the thread is doing.  I still haven’t figured out an easy way to peel the backing off the Pellon Wonder Web paper.  Anyone have any tips for this?


I also made a bow-hanging thing (not sure what to call it), which was super easy.  I made one for Emery and it’s great for keeping your bows in one place so I decided to make it for a friend of mine who is having a girl next month.  All I did for this was take ribbon and fold it on top of each other, sew it down the sides and then sew a loop for it to hang on a hook or a doorknob.  Easy peasy!  Thank goodness one thing took me only about five minutes.

Wednesday, September 7, 2011

Squash "stew"


…as Elton called it last week when he claimed he actually really liked it and wouldn’t mind it for dinner again this week.  No problem!  This is a new favorite recipe of mine that I got from my mom a few weeks ago.  She gets a produce box delivered to her house in the summer and fall and when she received a spaghetti squash, she didn’t know what to do with it.  She says one of her favorite things to do is “google” a recipe for an item she’s never cooked with and I’m glad I was in town for this one.  She found this recipe through allrecipes.com and it is delicious!

I’ve tweaked a few things, but here is the basic rundown.  If you spot a spaghetti squash out and about, grab one because this makes a great, easy side dish.

Ingredients:


1 spaghetti squash
1  cup chopped zuchinni
1 small onion (can do red or white – I just use what I have on hand)
¼  cup kalamata olives (I LOVE olives so I usually put in about ¾ to 1 cup)
1 garlic clove
1-2 cups chopped tomatoes (you can do roma, cherry, whatever you have on hand)
Handful of basil
Salt, pepper, olive oil

What to do:
Preheat oven to 375 degree.

1)   The first part of the recipe is seriously the hardest.  Cut the squash in half.  It’s tough so be careful! I like to do it “hotdog style” as I used to tell my third graders.  I think it makes it easier to scrape in the end. 

2)   Scrape out the seeds and rub the inside with olive oil, salt, and pepper.
3)   Place face down on a baking sheet and roast for about 45 minutes.

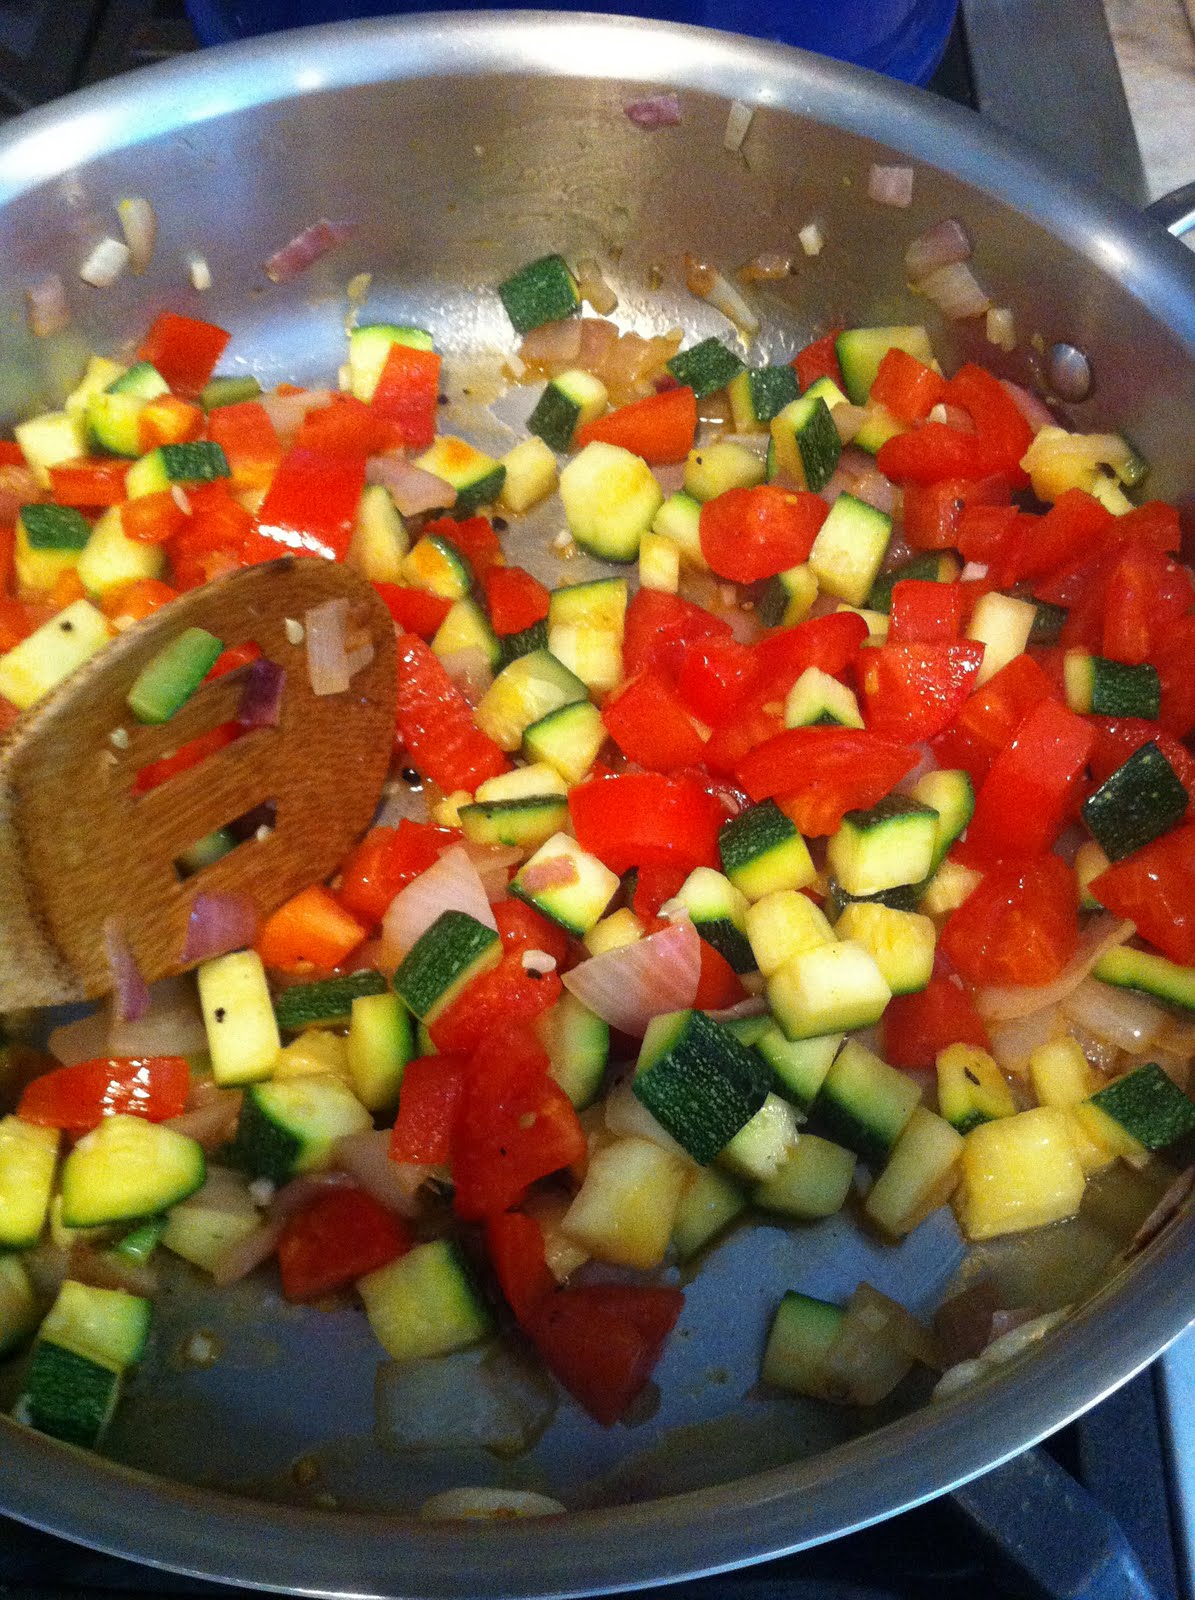
4)   Meanwhile, chop your onion, zucchini, tomatoes, garlic, and olives.  I usually like it chunky, but since Emery loves this dish, too, I do it bite size for her. 
5)   Sauté your onion in olive oil.  Once translucent, add the zucchini.  After about 5-10 minutes add your tomatoes and garlic and sauté for another 10-15 minutes.  (I actually like to roast my tomatoes and garlic since I already have the oven on, especially if I use cherry tomatoes.)


6)   When your squash is done, scrape the insides into the pot.  I use tongs to hold it since it’s hot and a fork will easily scrape the inside out.  It should be really easy to do.  If not, it may not be cooked enough.  Toss in olives and basil and mix all together.
 
7)   Serve.  Yum yum!
 
The original recipe also adds feta cheese, but I don’t think it needs it so I just leave that part out.  Feta, goat, or Parmesan could also add a little more yummi-ness to this recipe if you love cheese. 

Enjoy!